Installing Client for Microsoft Networks
On a Microsoft network, you must have Client for Microsoft Networks
installed in order to enable file and printer sharing. With Client
for Microsoft Networks installed, you can enable sharing, and you
can modify the properties of folders and printers in order to share
them. Client for Microsoft Networks is by default installed at initial
setup. You can install Client for Microsoft Networks manually if
it has been removed.
1. In Control Panel, double-click the Network icon.
2. On the Configuration tab click Add, The Select Network Component
Type dialog box appears.
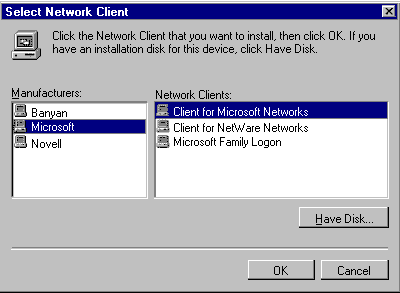
3. Click Client and click Add. The Select Network Client dialog
box appears .

4. Click Microsoft, and then click Client for Microsoft Networks.
5. Click OK. After installing Client for Microsoft Networks, you
can allow other computers on the network to access shared data on
your computer by enabling file and printer sharing for Microsoft
Networks.
|

