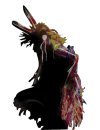
 |
| Step1. | Finding
the picture you want. In this case I choose this photos that a friend took.
Before you move to the next step make sure you remove the lock on the layer (.jpg
images are usually locked). To do this double click on the layer, a window will
pop up and ask you about new layer, just hit enter. By doing this you've
removed the lock and made the background transparent. | |
| Step
2. | Removing the background. Retrace
the outline of the figure using a combination of  or
or or or  .
In this case I used the lasso ,just to try out my new Digital
Art Table. If you're heavily into graphic designing and image editing the
art table comes in real handy. It works with just about any graphic program that
I use. .
In this case I used the lasso ,just to try out my new Digital
Art Table. If you're heavily into graphic designing and image editing the
art table comes in real handy. It works with just about any graphic program that
I use. Save this image dancer_outline.psd. We'll be using it later. | |
| Step
3. | Outline. Having
retraced the image I then select/load selection. Created a new layer, while the
selection was in place, filled it with black. Save this as dancer2_outline.psd
. So right now you should have three different images of the dancer saved | |
| Step
4. | Merge. Open dancer_outline.psd
and dancer2_outline.psd. Now we want the outline2 underneath of outline,
so you'll have one layer, outline1, showing and outline2 underneath it. Now lessen
the transparenty of the top layer so that it blends. Pick a light source and eraser the part you want shaded. I've choosen the top right as my light source.
 |  |
| Step
5. | Image merging.
Now go to the layers bar click on  and select Merge Visible. Go to Image/Trim now save as final_dancer.psd
.
 Hit Ctrl+A then Ctrl+X. Now open the the image with
the northen lights. Paste the dancer on that image Ctrl+V. Arrange
the dancer between the northen lights layers . Start erasering the bottom of the
dancer so that it appears as tough the dancers is steping out of the northern
lights. Give the dancer a green glow by double clicking on the layer, select
outerglow. | |
| Step
6. | Last
step. Add and tree line. Now save | |
| | | |

