|
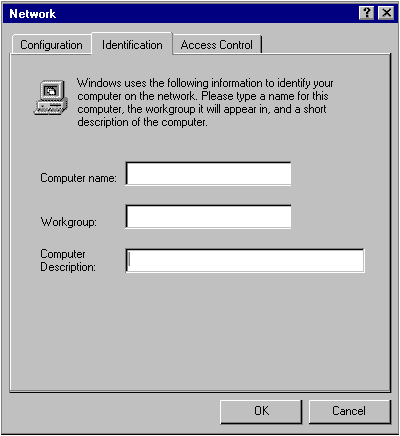
Assigning a Computer Name
Each Windows 98 computer on a network uses a unique name to distinguish
it from all other computers connected to the network. If another
computer, workgroup, or domain on the same network has the same
name, your computer cannot communicate on the network. Your computer
name can have up to 15 characters, and should contain no blank spaces.
Although Windows 98 allows you to enter spaces in a computer name,
spaces can cause problems with network connectivity.
Workgroup
In addition to the computer name, you must also specify a unique
workgroup name. The workgroup name, which is used for organizational
purposes only, defines your Network Neighbourhood. Whenever you
explore the Network Neighbourhood on the desktop, the computers
it displays are those that have the same workgroup name as your
computer. You should assign a common workgroup name to computers
that share resources such as files and printers with each other.
For example, you can assign a common workgroup name to computers
that belong to a single department, project, or site. ( Band Office,
School, Nursing Station )
Computer Description
You may also enter an optional description of your computer.
The description will appear to anyone browsing the network, but
it has no other function.
|
 |